The Evolving Art Deco SP7
As some of you have seen the modifications I did to the SP7 Pendulum Clock. I have morphed it even more lol... Which one do you like ? The last 2 I have hired freelance CAD designers to create the clocks for me.


83 Views
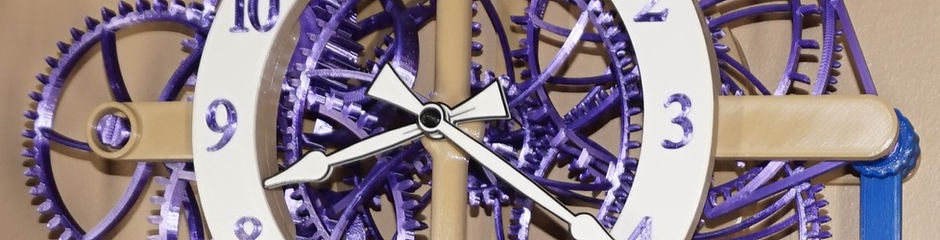
As some of you have seen the modifications I did to the SP7 Pendulum Clock. I have morphed it even more lol... Which one do you like ? The last 2 I have hired freelance CAD designers to create the clocks for me.

This is my version of the SP14 Large Moon Phase Clock. It's my 2nd Steve's Clock, the first being a SP8 Coup Perdu. So far it's run through an entire moon phase extremely well and is within my accuracy target of a minute per week.
I printed the clock last winter but didn't assembly it until recently. I noticed that all the thin wheels had warped to varying degrees.

I recovered the wheels using the procedure above with weights, heating the printer bed to 75C and letting them soak at that temperature for 15 mins and then cool. So far they seem to be holding their shape and I think the old PLA filament that was used was probably the problem.
The clock is running very robustly at the pulley weight shown. The wheel arbors are polished SS rods which I think provide a better bearing surface than piano wire…
Looks good. 4lb 10.4oz is a bit on the low side. The clock runs, as you say, but the pendulum amplitude is probably a bit shallow. This makes it sensitive to stopping from drafts or if it goes out of beat when winding. The amplitude should increase if you add another pound or two of drive weight.
Interesting about the warped gears. And I great solution. PLA can start getting soft around 60-70C. And supposedly it creeps over time, but I have not noticed the frames warping on any of my clocks mounted on the wall. One warped when I was travelling with it and placed it on the passengers side floor area of a car with the heater running.
I wanted to show off the 4 clocks I have printed. My favorite is the Coup Perdu desk clock (with Coup Perdu escapement). All run very well and keep good time. I am new to 3d printing and the more I learn the more I am impressed with Steve's designs and instructions because I can't imagine the amount of time it took to engineer and perfect these designs. I will eventually pick out another clock to print but have not decided which one yet. I am leaning toward one of the desk clocks that use a stepper motor because that will give me an excuse to learn a bit about arduino.

There are four stepper motor driven clocks to select from. All use the same algorithm with jumpers to select motor speeds since each clock has slightly different gear ratios between the motor and the second hand. They will all be accurate to about a minute per year. If you build your own controller, the assembly guide shows how to set up the Arduino IDE. There are also plenty of YouTube tutorials to help with the environment.
I've followed Steve's Clocks for a few years and downloaded (and paid for) a couple of his designs but this is the first one I've actually had time to build. Loving it - such a beautifully designed clock.
Right now I'm just testing the weight (2.7kg and running well) and as I have a some lead ingots but no lead shot, I need to design a new weight shell for my purposes.
Couple of comments - Steve's instructions use 3mm stainless bar, and 1.5mm music (piano) wire for the arbours. From my engineering understanding, brass is a better option as it's self-lubricating. I found both 1.5mm and 3mm brass rod for cheap on Amazon in the UK (search for Sourcing Map Brass Rod).
I also found some low cost low friction bearings on Amazon which I'm using successfully without flushing first (my pendulum has a free swing time of 9…
Looks good. This is an easy clock to get running.
I specify music wire for the 1.5mm rods because it is always hardened. The brass you linked is listed as high hardness, which should be good. Brass can also be listed as soft, half hard, ultra machinable, or unspecified. Some of these might be too soft for the smaller diameter arbors.
I saw a guy on YouTube melting lead ingot using a pot with a small hole drilled in it. He held the pot over a tray of water to cool the lead as it dripped out. Of course, do this outdoors and use other safety measures when working with lead.
They look amazing. They also look like non-functional AI images, especially the last ones. Where is the bottom half of the sun/moon dial? Why are there so many floating or partial gears? The AI engine adds so many non-functional gears for symmetry, yet the bottom right gear in the last image has non-symmetrical spokes.